Hi everyone. How has your week been so far? I have a super cute Christmas card I want to share with you!
I found him while browsing through Pinterest.....as you do 😆....I was just in love with this card as soon as I saw it!!
I cased it from a lovely lady by the name of Cindy Lawrence and I changed it to suit Stampin' Up! products, I had the perfect embossing folder for his beard, moustache and hat band.
I didn't have any cardstock that I liked for his face, nose and Lip so I sponged some Powder Pink ink on Whisper white cardstock and I think it turned out quite well!
I have done up some instructions on how to make him.
Santa Card Instructions
Instructions written by Donna Todd
Supplies
Cardstock
Real Red
Whisper White
Shimmery White
Punch
1/2” Circle
Colouring Tools
Real Red marker
Garden Green marker
Stampin’ Chalk marker
Powder Pink Ink pad
Memento Black ink pad
Embossing Folder
Swirls and Curls textured impressions embossing folder
Stamp set
Peaceful Poinsettia
Dies
Stitch shapes framelit
Detailed Poinsettia thinlits
Other tools
Sponge
Large round plate
Sissors
Adhesive
Dimensionals
Instuctions
Card base - Real Red cardstock 27 x 10.5 cm or half A4 lengthwise
Beard, Moustache and Hat band - Whisper White cardstock 12 x 10.5 cm
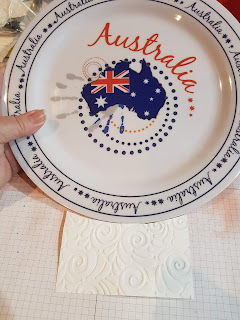
Emboss with the Swirls and Curls textured impressions embossing folder.
From the bottom measure up 6.5 cm on each side and place a mark. Line up the marks with your plate & draw the curve (on the reverse side of the cardstock so you can’t see your markings). then measure up another 2.5 cm on each side and place a mark and again line your plate up with the marks, draw the curve. Then you will see in the above photo I hand drew the bottom of the moustache and cut it out, make the length a bit smaller than 10.5 cm.
Santa Face - Whisper White cardstock 10.5 x 5.5 cm
Dab the sponge in the Powder Pink Ink pad and using circular motions starting off the cardstock and working your way onto the cardstock until you have coloured the entire piece.
Santa’s Nose - Using a piece of Whisper White cardstock and the second smallest oval Stitched shapes framelit cut one out then colour with the Powder pink ink the same as you did for his face. Mark a little highlight at the bottom right side using the chalk marker.
Santa’s Lip - using the 1/2” circle punch cut one out and ink the same as you did for his face and nose. Don’t worry if you leave a white bit where your finger is as this will go under his moustache.
Santa’s eyes - Punch 2 out using the 1/2” circle punch using the chalk marker draw his little highlights or you can draw them after you have glued them on.
Hat decoration - Using the Peaceful Poinsettia stamp set and dies use the little holly, cut it out and colour using the markers.
Putting it together - Place the face piece about 4cm up from the bottom on the card base and adhere. Adhere the beard piece lining up to the bottom of the card base and adhere the hat band at the top of the face piece ensuring no red is peeking through between the band and face. Adhere the moustache in place making sure you are able to slip the lip part up under the moustache and adhere it in place.
Adhere the eyes in place. Then the nose put 2 dimensionals on the back and adhere in place. Lastly adhere his hat decoration (the holly).

Hope you enjoy making him, I know I did!
have a great rest of the week!


No comments:
Post a Comment